
Birthday Ice Cream Cake
Indulge in a Sweet Celebration!
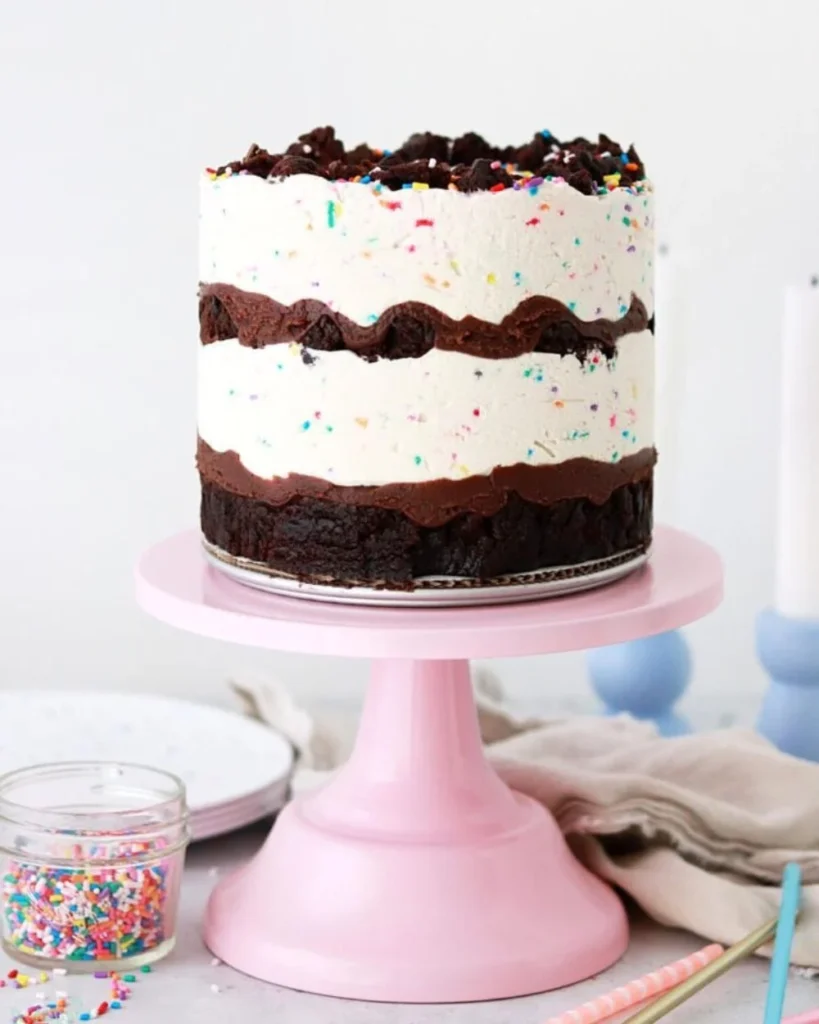
There’s something absolutely magical about birthdays, and what better way to celebrate than with a show-stopping Birthday Ice Cream Cake? This delightful dessert combines the classic taste of cake with the joyful creaminess of ice cream, making it a guaranteed crowd-pleaser for both kids and adults alike. With just a few simple ingredients and easy steps, you’ll create a vibrant, delicious cake that’s perfect for parties or cozy family gatherings. Get ready to enjoy layers of delectable flavors, decadent whipped cream, and a sprinkle of fun!
Recipe Information
- Prep Time: 30 minutes
- Cook Time: 25 minutes
- Total Time: 2 hours 55 minutes (including freeze time)
- Servings: 12 servings
- Difficulty Level: Easy
Nutrition Information
- Calories per serving: Approximately 300
- Protein: 4 grams
- Carbohydrates: 45 grams
- Fat: 12 grams
- Fiber: 1 gram
- Sugar: 25 grams
- Sodium: 220 mg
Why I Love This Birthday Ice Cream Cake
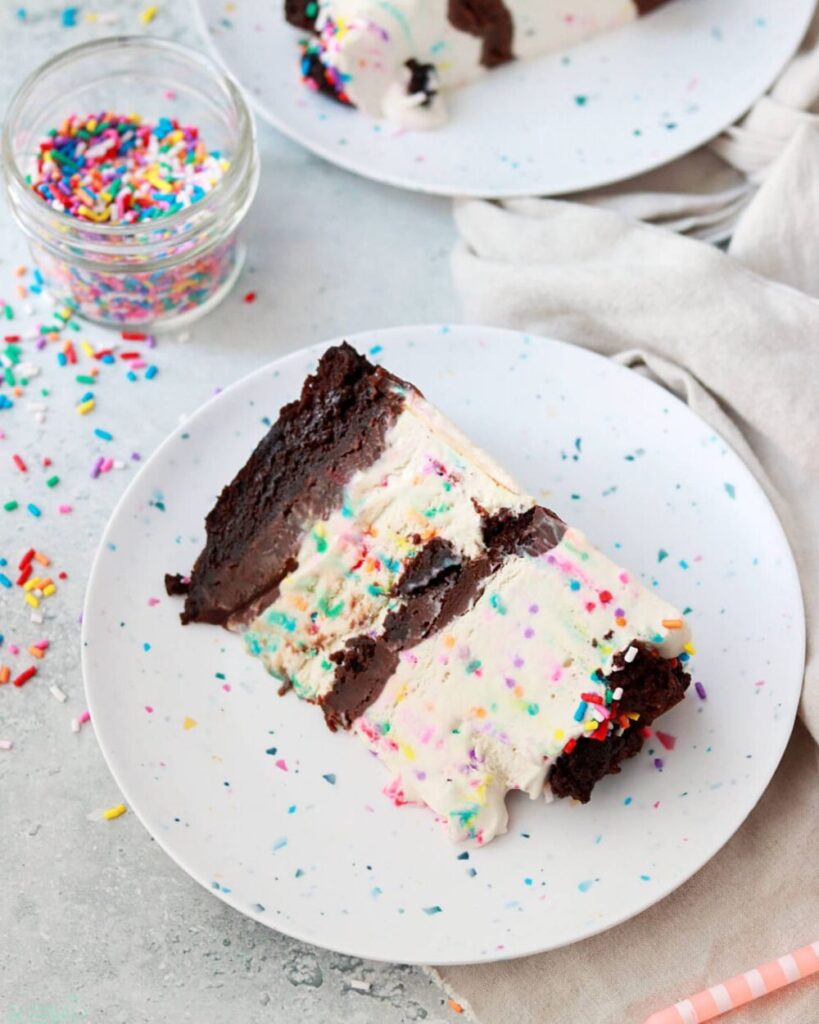
I absolutely adore this Birthday Ice Cream Cake because it brings everyone together to celebrate and indulge in something sweet! The combination of fluffy cake layers and creamy ice cream creates a heavenly texture that just melts in your mouth. Plus, it’s so much fun to customize with different ice cream flavors and colorful sprinkles that make it visually stunning. Whether you’re singing “Happy Birthday” or enjoying a casual summer evening, this cake adds a splash of joy and nostalgia, making every moment a special one.
Ingredients
1 box of cake mix,
3 pints of ice cream (different flavors),
1 container of whipped cream,
Chocolate sauce (for drizzling),
Sprinkles (for decoration)
How to Make Birthday Ice Cream Cake
Step 1: Bake the Cake
Start by baking the cake according to the package instructions. Once it’s golden and baked to perfection, take it out and let it cool completely on a wire rack. This is super important as it prevents the ice cream from melting when layered!
Step 2: Cut the Layers
Once your cake is cooled, carefully cut it into two or three layers. Using a serrated knife makes this step easy and helps keep those layers nice and even.
Step 3: Layer the Ice Cream
Place the first layer of cake on a serving plate. Now, it’s time to spread your first flavor of ice cream over the cake layer! Make it as thick as your heart desires for that creamy joy.
Step 4: Repeat the Layers
Add another layer of cake on top and repeat the process with the next ice cream flavor. Keep stacking until all your ice cream flavors are used, finishing with a layer of cake at the top.
Step 5: Whip It Good
Spread the whipped cream generously over the top and sides of your cake. This fluffy goodness makes for a lovely finish and keeps everything together.
Step 6: Drizzle and Decorate
Grab that chocolate sauce and drizzle it artfully over the top. Follow it up with a generous sprinkle of colorful decorations for that festive feel.
Step 7: Freeze It
Finally, pop your masterpiece into the freezer and let it chill for at least 2 hours. This ensures everything sets perfectly and is ready for slicing when it’s time to serve!
Tips & Variations
- Use gluten-free cake mix to make this treat suitable for gluten-sensitive guests.
- Make smaller mini ice cream cakes in individual cups for a fun serving option at parties!
- Want to jazz it up? Consider using fruit toppings or layers of pie filling between your cakes for a fresh twist.
- Serve with a side of hot fudge sauce or fresh berries for a burst of flavor that pairs beautifully with the ice cream cake.
Delicious Variations
- Chocolate Lava Cake: For chocolate lovers, this ooey-gooey dessert is a must-try!
- Funfetti Cupcakes: A colorful treat that’s fun to bake and perfect for birthdays!
- Ice Cream Sundae Bar: Let your guests create their customized sundaes with various toppings!
- No-Bake Cheesecake: Light, creamy, and perfect for those hot summer days.
Serving Suggestions for Birthday Ice Cream Cake
To enjoy this delicious Birthday Ice Cream Cake at its best, serve it straight from the freezer and let it sit for about 5 minutes before slicing. This ensures each piece comes out nicely! It pairs wonderfully with a glass of cold milk or a scoop of extra ice cream on the side. For a complete dessert experience, consider offering a refreshing fruit salad as a light complement to balance the richness of the cake.
Storage and Leftovers
To store any leftover Birthday Ice Cream Cake, cover it tightly with plastic wrap or aluminum foil and place it back in the freezer. It should stay fresh for up to a week. If you need too, you can cut it into individual pieces for easier serving later!
Helpful Questions
1. Can I use homemade cake for this recipe?
Absolutely! Homemade cake works great and lets you customize flavors even further.
2. How long should I freeze the cake?
Freeze it for at least 2 hours, but overnight is even better for a firmer texture.
3. What kind of ice cream works best?
Any flavor your heart desires! Try a mix of classic and adventurous flavors for diversity.
4. Can I prepare this in advance?
Yep! This cake keeps well in the freezer, so you can make it a day ahead of time.
5. What if I can’t find sprinkles?
No problem! Use crushed cookies, nuts, or fruit instead for a creative touch.
Birthday Ice Cream Cake
- Total Time: 175 minutes
- Yield: 12 servings 1x
- Diet: Vegetarian
Description
A delightful dessert combining fluffy cake layers with creamy ice cream, perfect for birthday celebrations.
Ingredients
- 1 box of cake mix
- 3 pints of ice cream (different flavors)
- 1 container of whipped cream
- Chocolate sauce (for drizzling)
- Sprinkles (for decoration)
Instructions
- Bake the cake according to the package instructions and let it cool completely on a wire rack.
- Carefully cut the cooled cake into two or three layers.
- Place the first layer of cake on a serving plate and spread the first flavor of ice cream over it.
- Add another layer of cake on top and repeat the process with the next ice cream flavor until all flavors are used.
- Spread whipped cream generously over the top and sides of the cake.
- Drizzle chocolate sauce artfully over the top and add colorful sprinkles for decoration.
- Freeze the cake for at least 2 hours before serving.
Notes
Use gluten-free cake mix for gluten-sensitive guests. Consider using fruit toppings or layers of pie filling for a fresh twist.
- Prep Time: 30 minutes
- Cook Time: 25 minutes
- Category: Dessert
- Method: Layering
- Cuisine: American
Nutrition
- Serving Size: 1 slice
- Calories: 300
- Sugar: 25g
- Sodium: 220mg
- Fat: 12g
- Saturated Fat: 7g
- Unsaturated Fat: 3g
- Trans Fat: 0g
- Carbohydrates: 45g
- Fiber: 1g
- Protein: 4g
- Cholesterol: 20mg
There are no reviews yet. Be the first one to write one.