
Baked Teriyaki Chicken Recipe
➤ Introduction for Baked Teriyaki Chicken Recipe
I’ve been preparing this baked teriyaki chicken for many years now, and it is honestly so effortless when compared with everything involved stovetop cooking. There will be no more standing at the frying pans stirring constantly or dodging oil splatters while cooking, and not once do I have to be concerned about burning the sauce.
What I absolutely love is that, while baking, the chicken comes out so tender with a gorgeous, glossy coating that turns all sticky and golden. The sauce reduces and concentrates down on its own in the oven allowing to produce amazing, multi-layered flavor that simply cannot be replicated.
The whole affair ultimately develops a really beautiful lacquered look that truly look just as delicious as any fine Japanese restaurant would serve, also the process of baking means I can cook all the chicken evenly and just right without babysitting it on the stovetop, and eliminates the possibility of having sauce sticking or burning at the bottom of the pan.
One thing that blows my mind about this recipe is how juicy it is! When you coat the chicken in the signature teriyaki glaze each piece is sweet, salty, and rich in umami flavors. The gentle heat of the oven allows the chicken to remain tender and moist from edge to center so that every single mouthful is followed up on the next.
➤ Why I Love This Baked Teriyaki Chicken Recipe
• I really love that I can pop this into the oven and let it do all the work while I prepare sides or maybe just sit on the couch and ruin my diet accordingly.
• I love that it doesn’t require any added oil in baking, so it is way lighter than the pan-fried teriyaki chicken I used to make.
• I love that the oven method creates this beautiful, evenly caramelized glaze time after time without burning.
• Honestly, I’ve never met anyone who doesn’t love this recipe – it is so mild that my kids demolish it, but it is also flavourful enough for adults to be impressed.
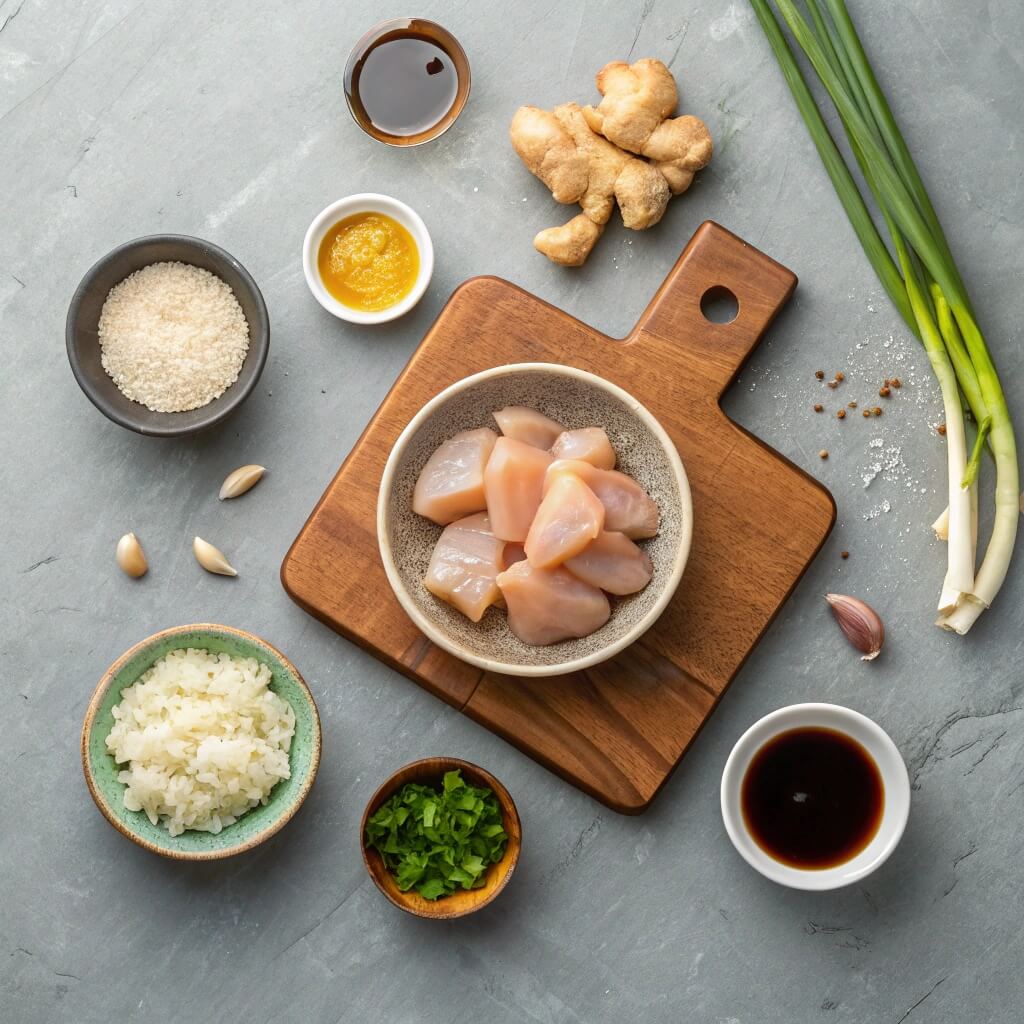
➤ Baked Teriyaki Chicken Recipe Ingredients
Teriyaki Sauce Ingredients:
•1/2 cup soy sauce (I always pick up low sodium soy sauce, but do you).
•1/4 cup mirin (or if you don’t have mirin, then you can substitute 1/4 cup rice wine + 1 tbsp sugar because it’s close enough).
•1/4 cup brown sugar (pack it down, don’t just sprinkle).
•2 tablespoons honey (the sticky, liquefied stuff).
•2 tablespoons rice vinegar.
•1 tablespoon corn starch + 2 tablespoons cold water (mix it up so you don’t get weird lumps).
Aromatic Ingredients:
•4 cloves garlic, minced (I just smash and chop – who even measures garlic anyway?)
•2 tablespoons fresh ginger grated ( don’t peel it unless you really have to, as long as you rinse it off you’re fine).
•2 green onions, chopped (I keep the whites and greens separate for now)
•1 teaspoon sesame oil.
For the Chicken:
•2-3 lbs chicken thighs or breasts cut up into bite-sized pieces (use thighs, they’re the best, but if you really want to use breasts, that’s fine).
•1 tablespoon vegetable oil (or whatever oil I have in the kitchen)
•1/2 teaspoon salt
•1/4 teaspoon black pepper
•2 tablespoons sesame seeds (sprinkle on top like you fancy).
•2 green onions sliced as a garnish (use white and green parts separately, or just whatever is left in the fridge).
➤ How to Make Baked Teriyaki Chicken Recipe
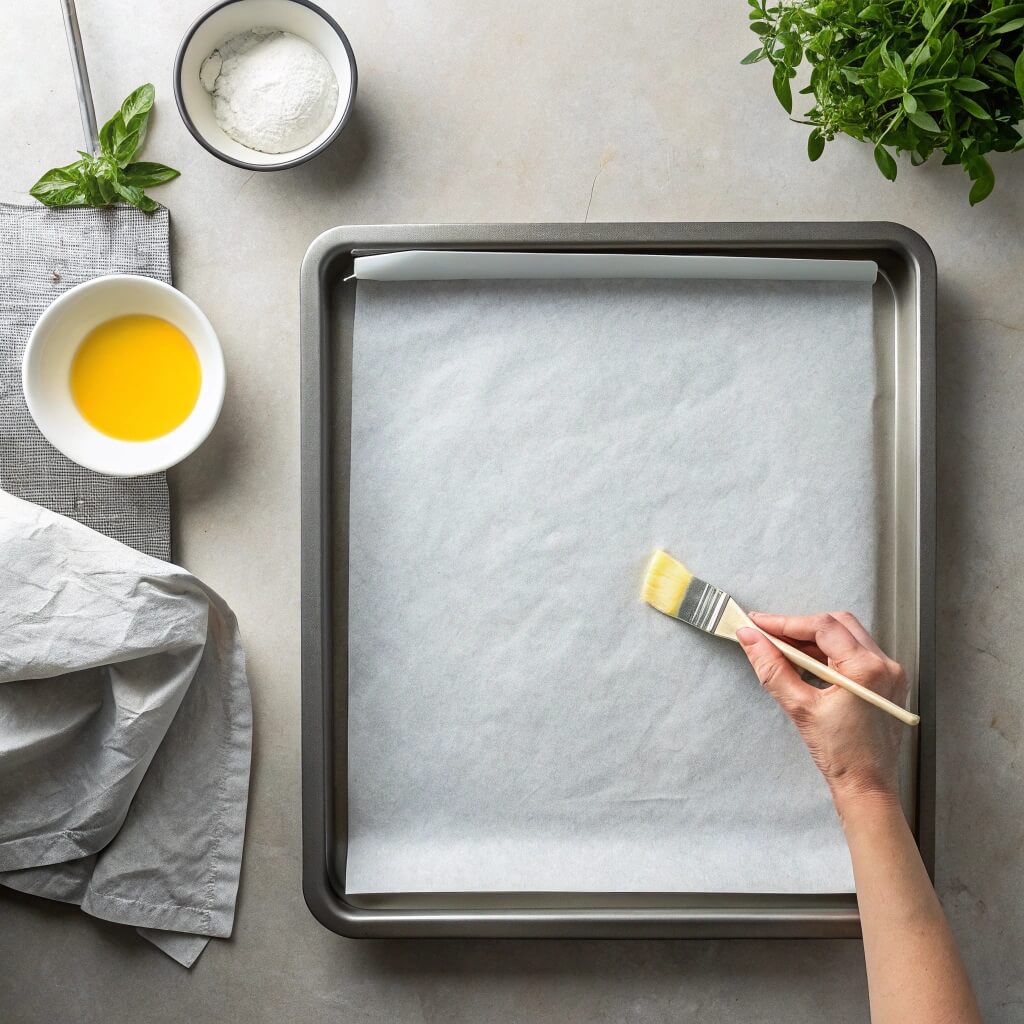
1 • Get the oven and pan ready:
•I set my oven to 425°F and place a large baking sheet lined with parchment paper. I lightly grease the parchment because, trust me, you don’t want anything to stick when that sauce goes to caramelizing.
2 • make the teriyaki sauce:
•I take a medium sized saucepan and whisk together my soy sauce, mirin, brown sugar, honey, and rice vinegar. Then I add my minced garlic, grated ginger, and the white portions of my green onions (saving the greens for later).
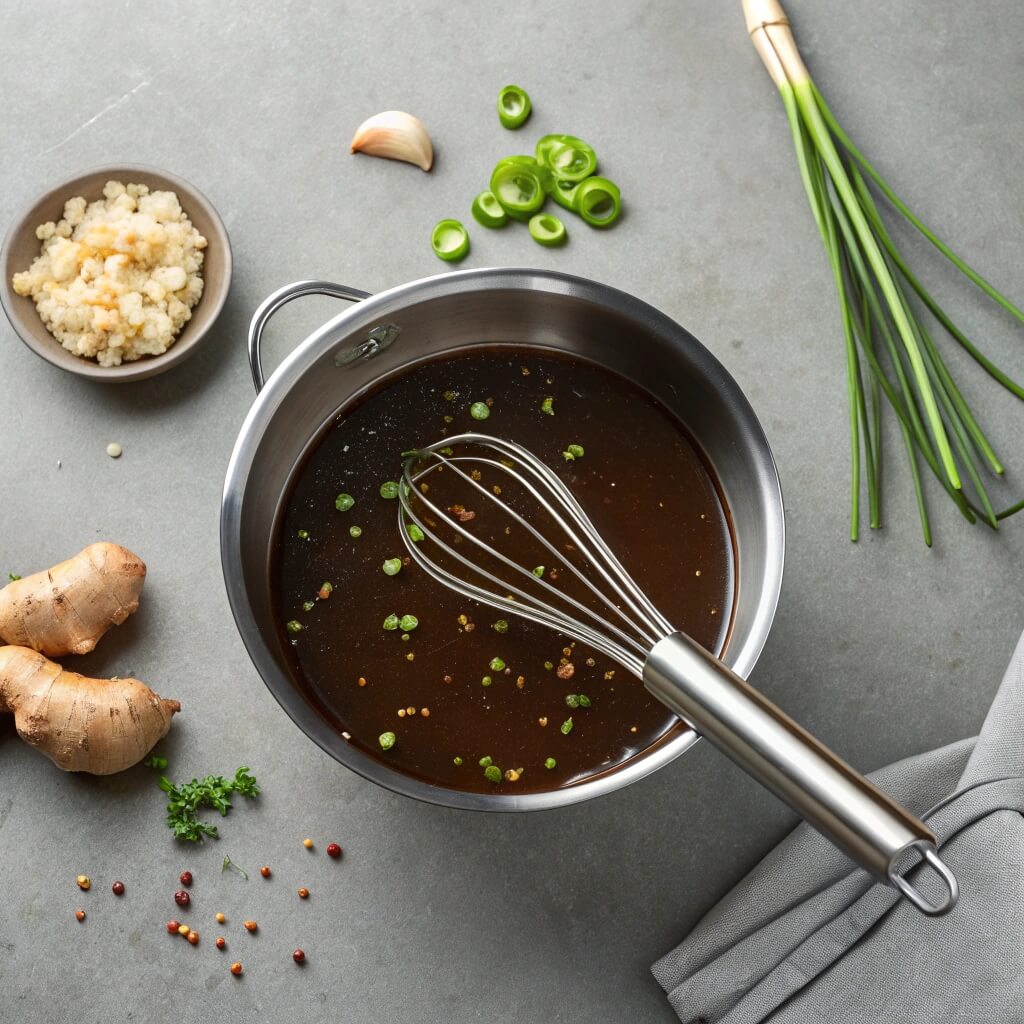
3 • Cook the sauce base:
•I bring everything to a simmer that you can almost see bubbling over medium heat, stirring the sauce frequently to keep the sugar from clumping up, letting it bubble away for about 3-4 minutes until the flavor starts to marry and it reduces somewhat.
4 • Thicken the sauce:
•I give that cornstarch slurry a quick stir since the cornstarch always separates, then I whisk the slurry into my simmering sauce slowly. I keep stirring for about a minute or two until the sauce thickens enough to coat the back of a spoon. Once thick, I remove from heat and stir in the sesame oil.
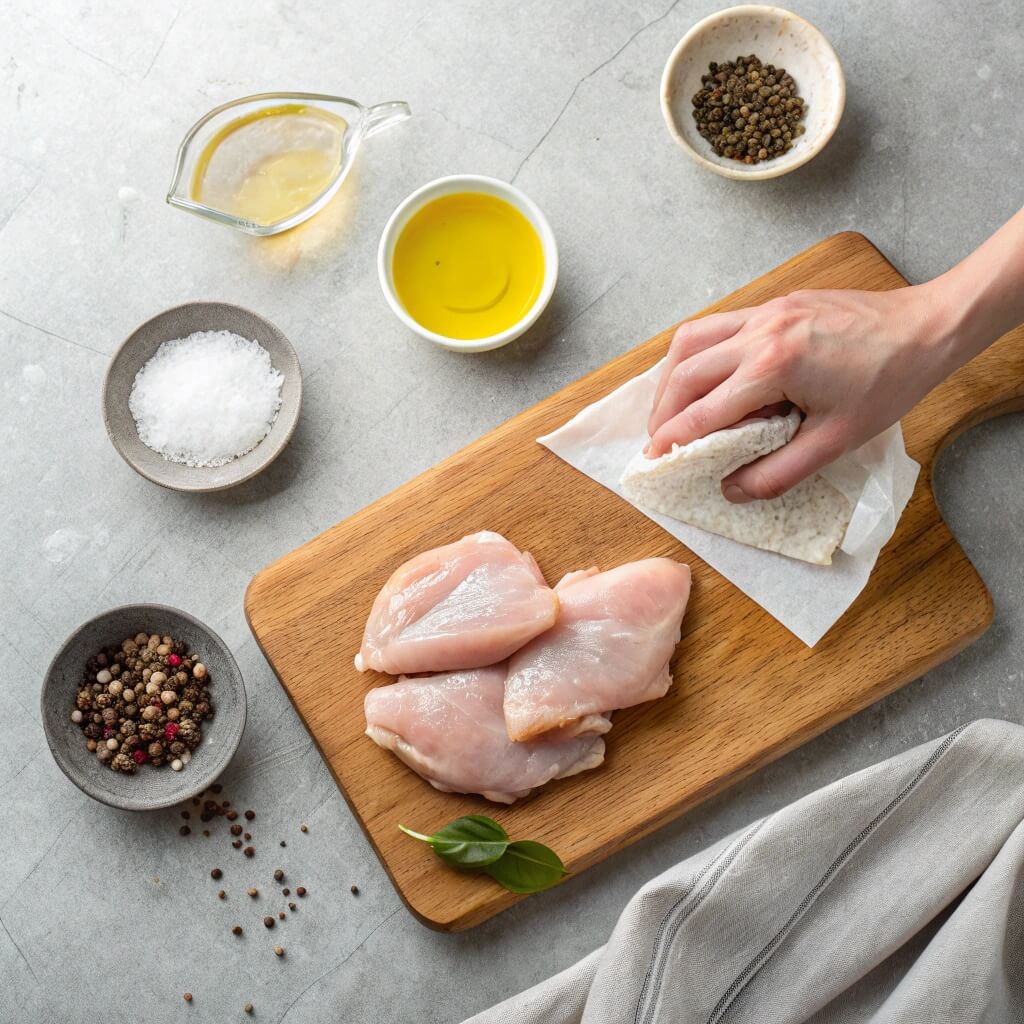
5 • Prep time for the chicken:
•Alright, first things first – I pull out a couple paper towels, and I pat those chicken pieces down. Seriously, do not skip this; unless you want sad and pale chicken. I give them a solid sprinkle of salt and pepper, and then I go ahead and douse them – really, just a glug of veggie oil over the top, and I toss the whole lot with my hands until every piece is thoroughly and evenly coated and slick and shiny, like my exes. Then, I spread the chicken out on a baking sheet, giving each piece some space. No chicken crowding allowed.
6 • First round in the oven:
•Into the oven they go, 15 minutes on the clock – this is just to get them going, like a warm up for the chicken. The timer takes to ding and I pull the tray out, grab my brush, and slather on about half of the teriyaki sauce I made prior. Honestly, it is looking good and smelling fantastic already.
7 • Back for more baking:
•They go back into the oven for another 10, possibly 15 minutes – it really just depends on thickness of your pieces. I am usually hovering, and as soon as they are just about done, I pull them out and brush them with the rest of the sauce. Every
8 • Caramelization complete:
•This is the fun part – for the final 5-10 minutes, I am baking it until that sauce is all caramelized and the chicken reaches 165°F internal temperature. During these last few minutes, I’m basically watching the oven window, hoping for no burning to occur! If it looks glossy and sticky, I am happy with it.
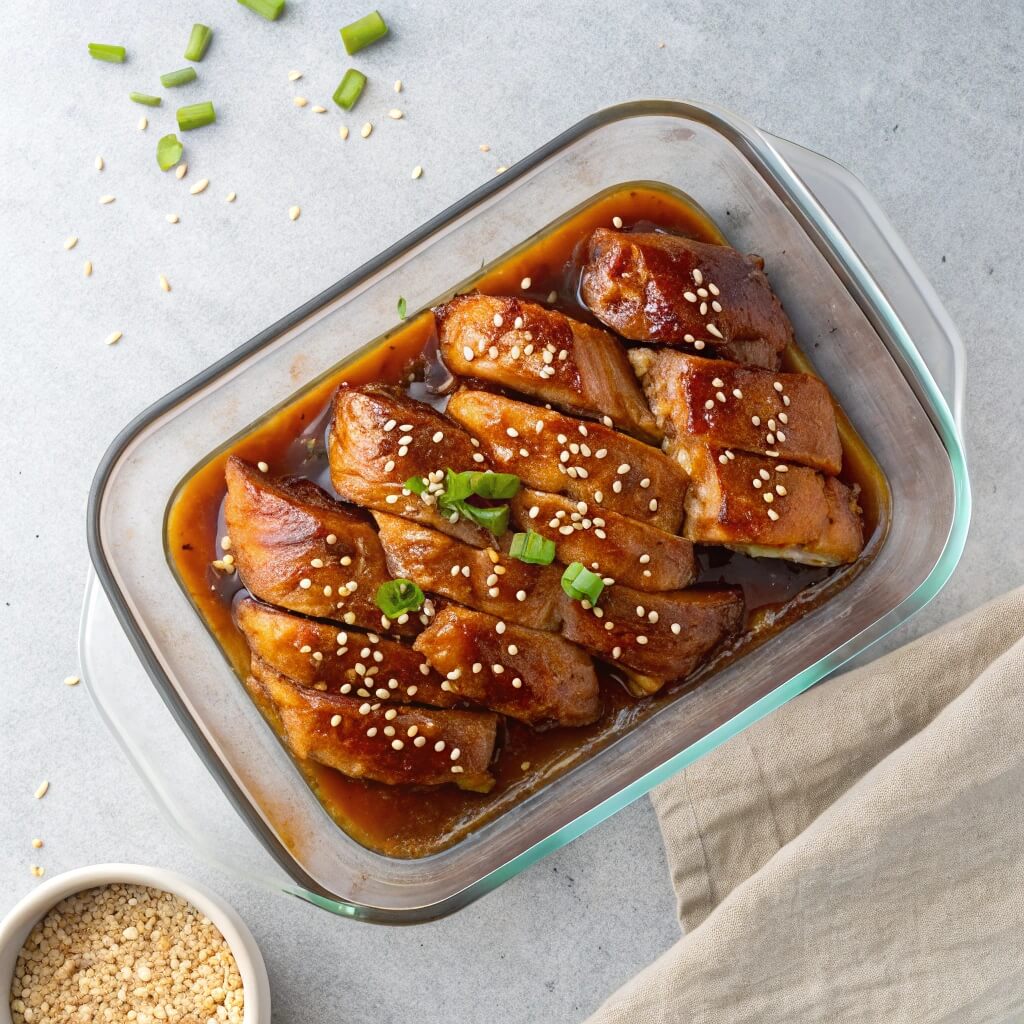
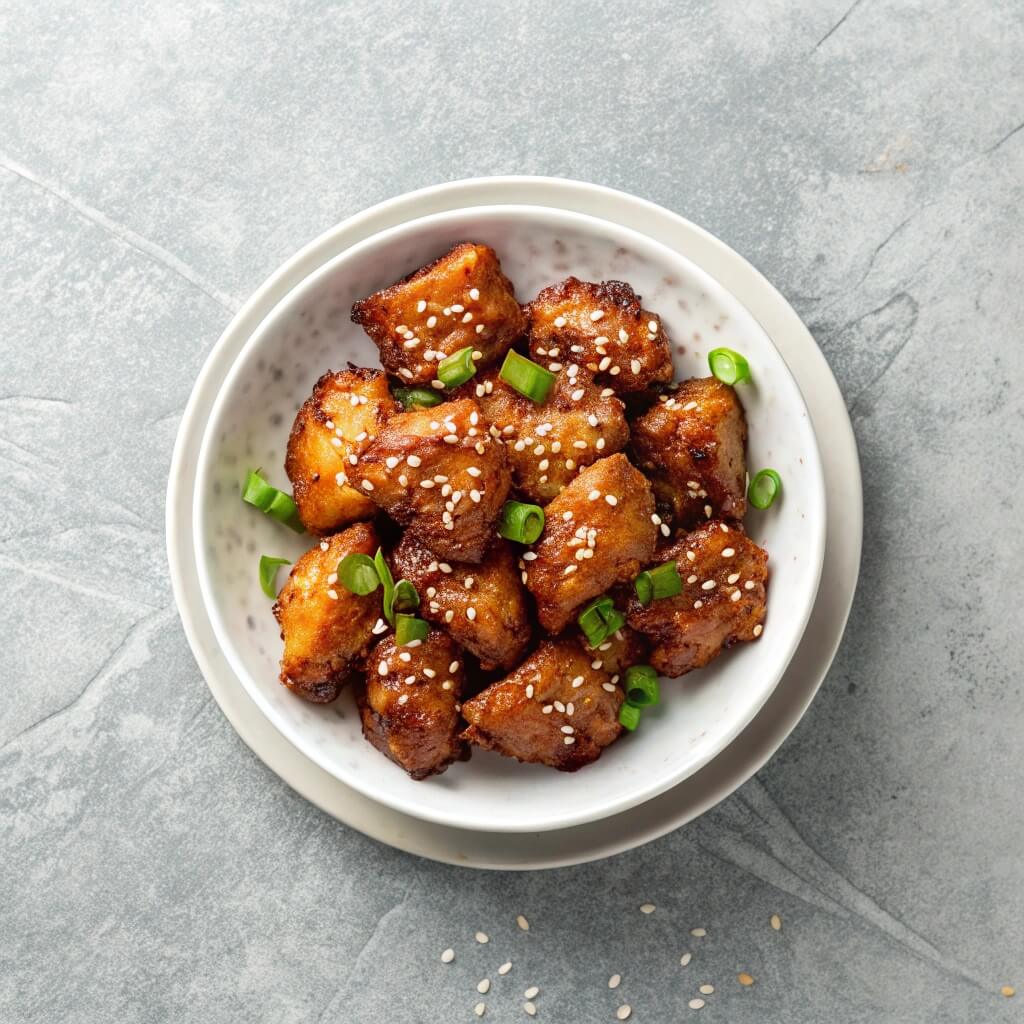
9 • Rest and garnish:
•The chicken has to rest for about 5 minutes so that the sauce can set up and all those juices can redistribute. I then sprinkle on my sesame seeds and the top of those green onions I reserved, and serve!
➤ Baked Teriyaki Chicken Recipe Tips & Variations
• If my sauce is too thick, I can thin it out by adding a little bit of water or broth and if it is too thin I just let it simmer longer to let the flavors concentrate.
• I usually pick thighs because they are so much more tender because of the extra fat, but breast works as well, I just need to be monitoring the time more so they do not dry out.
• I also love to toss in some vegetables in the last 20 minutes broccoli, bell peppers, snap peas or carrots, it’s a complete meal and I don’t have to dirty another pan.
➤ Serving Suggestions for Baked Teriyaki Chicken Recipe
• I can also really enjoy this over lo mein or rice noodles, which I’ve tossed with a little sesame oil and soy sauce to give it that perfect takeout Asian feel.
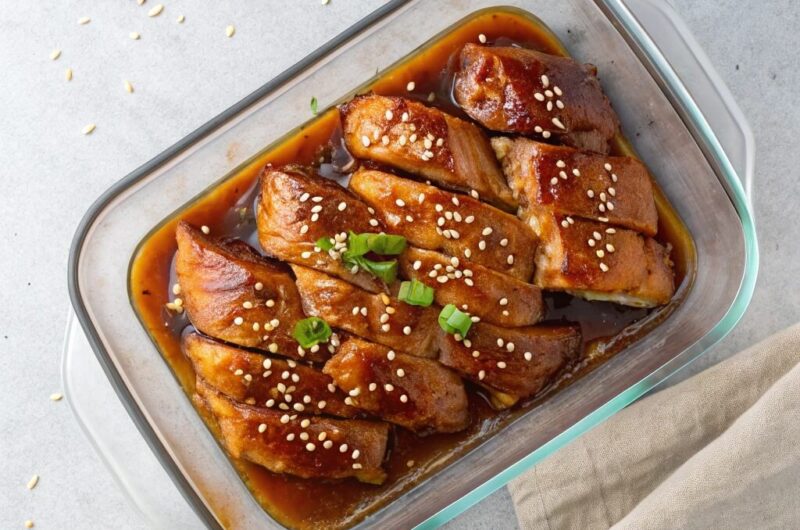
• This is also a great item for meal prep, I pack it into bento boxes and it keeps its shape and flavor really well even after a few days in the fridge.
• If I’m really going all out, I would also make some vegetable fried rice or steam some dumplings to go along with it for a pretty impressive dinner spread that makes everyone think I’m some sort of master chef.
If you’re enjoying this Baked Teriyaki Chicken Recipe, you must also try my Asian Chicken Marinade Recipe next. It is perfect for grilling and stir-frying and the flavors are complex and definitely Asian, but go beyond typical teriyaki. I can’t even tell you how many times I have made it…I can honestly say it is becoming one of my go-to recipes!
➤ Storage and Leftovers
• To be honest I just throw my homemade teriyaki sauce in the fridge–in an airtight container of course–for about a week. The funny thing is I think it tastes better after just a day or two. Is that a thing? I dunno, maybe.
• As for leftover chicken that is a lifesaver! I keep that in sealed containers too, and it’s still good for four days? Maybe I could stretch that to five if I feel it being lucky (you can’t pin that on me, if you get some weird impression then that’s on you). This is great for those “I-have-to-eat-something” lunches.
Baked Teriyaki Chicken Recipe
Course: Breakfast6
servings15
minutes40
minutes380
kcalIngredients
- Teriyaki Sauce Ingredients:
1/2 cup soy sauce (I always pick up low sodium soy sauce, but do you).
1/4 cup mirin (or if you don’t have mirin, then you can substitute 1/4 cup rice wine + 1 tbsp sugar because it’s close enough).
1/4 cup brown sugar (pack it down, don’t just sprinkle).
2 tablespoons honey (the sticky, liquefied stuff).
2 tablespoons rice vinegar.
1 tablespoon corn starch + 2 tablespoons cold water (mix it up so you don’t get weird lumps).
- Aromatic Ingredients:
4 cloves garlic, minced (I just smash and chop – who even measures garlic anyway?)
2 tablespoons fresh ginger grated ( don’t peel it unless you really have to, as long as you rinse it off you’re fine).
2 green onions, chopped (I keep the whites and greens separate for now)
1 teaspoon sesame oil.
- For the Chicken:
2-3 lbs chicken thighs or breasts cut up into bite-sized pieces (use thighs, they’re the best, but if you really want to use breasts, that’s fine).
1 tablespoon vegetable oil (or whatever oil I have in the kitchen)
1/2 teaspoon salt
1/4 teaspoon black pepper
- Finishing Touches:
2 tablespoons sesame seeds (sprinkle on top like you fancy).
2 green onions sliced as a garnish (use white and green parts separately, or just whatever is left in the fridge).
Directions
- I set my oven to 425°F and place a large baking sheet lined with parchment paper. I lightly grease the parchment because, trust me, you don’t want anything to stick when that sauce goes to caramelizing.
- I take a medium sized saucepan and whisk together my soy sauce, mirin, brown sugar, honey, and rice vinegar. Then I add my minced garlic, grated ginger, and the white portions of my green onions (saving the greens for later).
- I bring everything to a simmer that you can almost see bubbling over medium heat, stirring the sauce frequently to keep the sugar from clumping up, letting it bubble away for about 3-4 minutes until the flavor starts to marry and it reduces somewhat.
- I give that cornstarch slurry a quick stir since the cornstarch always separates, then I whisk the slurry into my simmering sauce slowly. I keep stirring for about a minute or two until the sauce thickens enough to coat the back of a spoon. Once thick, I remove from heat and stir in the sesame oil.
- Alright, first things first – I pull out a couple paper towels, and I pat those chicken pieces down. Seriously, do not skip this; unless you want sad and pale chicken. I give them a solid sprinkle of salt and pepper, and then I go ahead and douse them – really, just a glug of veggie oil over the top, and I toss the whole lot with my hands until every piece is thoroughly and evenly coated and slick and shiny, like my exes. Then, I spread the chicken out on a baking sheet, giving each piece some space. No chicken crowding allowed.
- Into the oven they go, 15 minutes on the clock – this is just to get them going, like a warm up for the chicken. The timer takes to ding and I pull the tray out, grab my brush, and slather on about half of the teriyaki sauce I made prior. Honestly, it is looking good and smelling fantastic already.
- They go back into the oven for another 10, possibly 15 minutes – it really just depends on thickness of your pieces. I am usually hovering, and as soon as they are just about done, I pull them out and brush them with the rest of the sauce. Every
- This is the fun part – for the final 5-10 minutes, I am baking it until that sauce is all caramelized and the chicken reaches 165°F internal temperature. During these last few minutes, I’m basically watching the oven window, hoping for no burning to occur! If it looks glossy and sticky, I am happy with it.
- The chicken has to rest for about 5 minutes so that the sauce can set up and all those juices can redistribute. I then sprinkle on my sesame seeds and the top of those green onions I reserved, and serve!
Notes
- Veggie Add-Ins: You can add in some broccoli, bell peppers, or snap peas during the last 20 minutes for an all-in-one meal.
Make-ahead sauce: You can make the sauce up to 3 days ahead of time and just store in the fridge – makes things so easy!
Double batches: Absolutely! Use two baking sheets and switch around halfway through cooking it and you are golden.
➤ Baked Teriyaki Chicken Recipe FAQs
Q: Can I substitute chicken breasts instead of thighs?
⤷ A: Absolutely! Feel free to do that as long as you don’t cook them into charcoal. You’ll probably want to cut 5-10 minutes off your time so they don’t turn out drier than my humor.
Q: What if I don’t have mirin?
⤷ A: Yeah, that’s a concern. Not much you can do there. Find some rice wine vinegar and add a spoonful of sugar for the same effect. Or, just a splash of dry sherry with a little sugar. It won’t get graded.
Q: Can I skip the cornstarch?
⤷ A: Sure. But your sauce will be thinner, just so you know. You can simmer longer to get it thicker. Patience, grasshopper.
Q: Help! My sauce is burning!
⤷ A: Yikes! Keep your oven at 425°F max and actually watch it! Don’t just set it and walk away and hope for the best! If your sauce starts getting too dark, cover it with foil…easy fix.
Q: Can I double this recipe?
⤷ A: Hell yes! Just don’t put all the chicken on one sheet pan or else it will just steam not roast! Use two sheet pans spaced out, easy peasy, Bob’s your uncle.
Q: I’m obsessed with this Baked Teriyaki Chicken recipe! Can I make Baked Teriyaki Chicken for meal prep every week? Like, will my family get tired of Baked Teriyaki Chicken if I serve it twice a week? I’ve been making this Baked Teriyaki Chicken for three weeks straight now, and honestly, I’m thinking about trying different marinades with my Baked Teriyaki Chicken. Do you think I could use the same technique for Baked Teriyaki Chicken but switch up the sauce? I mean, this Baked Teriyaki Chicken is just so easy and delicious – I can’t stop making it!
⤷ A: Yeah, you can totally meal prep it every week! It keeps great in the fridge for 3-4 days.
About your family getting tired of it – maybe switch things up with different sides or add some veggies to the pan. You could also alternate between thighs and breasts to change the texture.
For different marinades, absolutely! The baking technique works with honey garlic, orange ginger, or even a spicy sriracha glaze. Just keep the cooking time and temperature the same.
There are no reviews yet. Be the first one to write one.